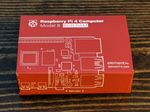
This blog post will discuss how to get started using your Raspberry Pi. Hopefully, this will be the first of many Raspberry Pi related posts to come. This post will focus on how to format your SDCARD and write the Raspbian image to it. This blog post will assume that you’re using either a UNIX or Linux based system.
Awright, let’s get crackin’ and hopefully learn some stuff! :).
First, tail -f whatever log you’re writing kernel messages to. For most people this is either /var/log/messages or /var/log/kern.log.
skywalker@thedeathstar ~ # tail -f /var/log/kern.log
Second insert your SDCARD in whatever device you're using to do the formatting with.
You should now see similar output in your terminal running tail -f like below:
skywalker@thedeathstar ~ # tail -f /var/log/kern.log
Aug  9 18:26:18 glh-laptop3 kernel: [ 1490.840220] mmc0: new high speed SDXC card at address b368
Aug  9 18:26:18 glh-laptop3 kernel: [ 1490.874698] mmcblk0: mmc0:b368       59.6 GiB
Aug  9 18:26:18 glh-laptop3 kernel: [ 1490.882594]  mmcblk0: p1
As you can see from above device mmcblk0 is the device name of my SDCARD. This will probably be different for you.
Let's use fdisk -l to make sure we've identified the right device.
skywalker@thedeathstar:~# fdisk -l /dev/mmcblk0

Disk /dev/mmcblk0: 64.1 GB, 64054362112 bytes
255 heads, 63 sectors/track, 7787 cylinders, total 125106176 sectors
Units = sectors of 1 * 512 = 512 bytes
Sector size (logical/physical): 512 bytes / 512 bytes
I/O size (minimum/optimal): 512 bytes / 512 bytes
Disk identifier: 0x00000000

        Device Boot      Start         End      Blocks   Id  System
/dev/mmcblk0p1           32768   125106175    62536704    7  HPFS/NTFS/exFAT
Since I know my SDCARD is 64GB in size I'm pretty confident I've got the right device.
Now let's wget our Raspbian image.
skywalker@thedeathstar:/mnt/usb/iso# wget -c http://files.velocix.com/c1410/images/raspbian/2013-07-26-wheezy-raspbian/2013-07-26-wheezy-raspbian.zip
--2013-08-09 21:35:06--  http://files.velocix.com/c1410/images/raspbian/2013-07-26-wheezy-raspbian/2013-07-26-wheezy-raspbian.zip
Resolving files.velocix.com (files.velocix.com)... 212.187.212.226
Connecting to files.velocix.com (files.velocix.com)|212.187.212.226|:80... connected.
HTTP request sent, awaiting response... 302 Found
Location: http://212.187.212.153/bt/3edc0f51c47c6283ec08c37913fb56e1eddaeaeb/data/2013-07-26-wheezy-raspbian.zip [following]
--2013-08-09 21:35:06--  http://212.187.212.153/bt/3edc0f51c47c6283ec08c37913fb56e1eddaeaeb/data/2013-07-26-wheezy-raspbian.zip
Connecting to 212.187.212.153:80... connected.
HTTP request sent, awaiting response... 200 OK
Length: 518475358 (494M) [application/zip]
Saving to: `2013-07-26-wheezy-raspbian.zip'

100%[==========================================================================================================================================================================>] 518,475,358 1.10M/s   in 7m 18s

2013-08-09 21:42:25 (1.13 MB/s) - `2013-07-26-wheezy-raspbian.zip' saved [518475358/518475358]
Next use unzip to unzip the Raspbian disk image.
skywalker@thedeathstar:/mnt/usb/iso# unzip 2013-07-26-wheezy-raspbian.zip
Archive:  2013-07-26-wheezy-raspbian.zip
  inflating: 2013-07-26-wheezy-raspbian.img
Now use dd to write the Raspbian disk image to your SDCARD.
skywalker@thedeathstar:/mnt/usb/iso# dd bs=4M if=2013-07-26-wheezy-raspbian.img of=/dev/mmcblk0
If you made it this far congrats! You should be ready to insert you SDCARD into your pi, hook things up, plugin the power adapter, and boot up Raspbian.
However, I had an issue in which I simply had no video what so ever. If you experience the same, and you’re using HDMI, you may need to do the following to get video working on your pi. This assumes you have your SDCARD mounted at /media.
skywalker@thedeathstar: ~ # cat /media/boot/config.txt |grep safe
# uncomment if you get no picture on HDMI for a default "safe" mode
hdmi_safe=1
Uncomment the above line in config.txt to enable hdmi_safe mode.
Well that's it. Hopefully at this point you can at least boot up your pi running Raspbian!
Stay tuned to my blog for future posts on the Raspberry Pi!


